On to the tutorial!
Some friends and I recently got together and made these super fun chevron monogram canvases. I made the 8x10 Navy ones later on to coordinate with the Aqua 11x14 I made with my friends.
They were so easy, I wanted to create a tutorial with the smaller ones.
What you'll need:
8x10 or 11x14 Canvas
4 bottles of paint (you pick the colors, but it looks best if one is white - I chose Navy, White, Coral (melon), and Aqua)
3/4" - 1" wide paint brush
Small round paint brush
Paper or styrofoam plate (for your paints)
Ruler
Pencil (with a good eraser)
Circular object about 4"-5" (to make the circle for the monogram)
Time to create!
1. Take your canvas and with your ruler and pencil, draw a straight line, vertically down the center. Then do the same horizontally. From those lines, make a 1-1/2" - 2" grid. The 1-1/2" is what I did on my 8x10's. I did a 2" grid on my 11x14.
2. Beginning anywhere on the canvas, draw a diagonal line in one of the squares. Then repeat that same diagonal line all the way up and down that particular column.
3. On the next column over, create opposite diagonal lines down that one.
4. Then continue the pattern until your canvas looks like this...
*Note: the edges may get tricky on ya, but just eye them, getting them pretty close to the rest of the pattern
5. Erase the horizontal and vertical lines, taking care not to erase the chevron (diagonal) lines that you just made.
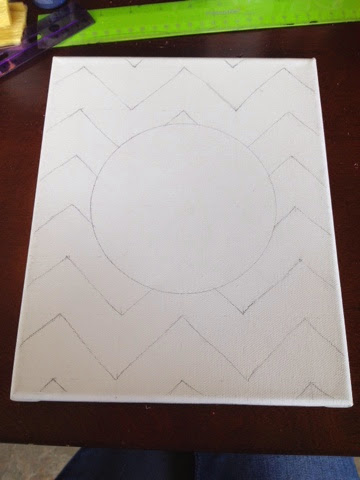
Now your canvas should look like this...
6. Take your round object (I used a bowl), place it in the center of your canvas and trace around it with your pencil.
7. Then erase all of the lines INSIDE of the circle.
Now you should have something that looks similar to this...
8. Now we start painting! Begin with your white and paint every other chevron stripe. Give it two coats.
9. Then go back and paint your color stripes. The darker the color, the more coats of paint you'll need, it seems. My navy needed 4 coats of paint...
*coat four* - finally! You can see my pictures progressively getting darker. Haha. I did two of these at the same time so it took me a little while to finish...as the sun set.
10. Get your circle color and paint the inside of your circle.
11. Get your monogram color and frame out the circle with your small round paint brush. Then add your initial/monogram. I free-handed my monograms, but you can use a stencil, or pencil it before you use paint to get it just right.
I added some highlights to the top of my peaks and a shading to the bottom of my valleys to "chic" it up a bit. You can too with just a bit of white and black paint (respectively) mixed with your chevron color and using the small round brush.
Aaaand...your done!
Fun, huh?


No comments:
Post a Comment