Saturday, November 23, 2013

Giveaway Winners

It's Giveaway time!! 


Of the list of names I have of people who have "Liked" my OBBK Facebook Page, shared the photo of the item they want to win, and commented what size they need, Kayla Lasley won the dress and Carrie Moncrief won the bowtie!
Congratulations, Ladies!!  We will be in touch.  :)

Wednesday, November 20, 2013

{Practically} Free Fancy Necklace Organizer

I asked my hubs to get a jigsaw for our anniversary.  What can I say?  I'm a hopeless romantic. Haha.  Ever since, I've been anxious to find a reason to use it.  Today, the opportunity finally arose!  While I was cutting down some shelving, I got the hankerin' to do something shmancy with my jigsaw and I decided I would do something about the fact that my long necklaces don't fit in my jewelry box.
So here's my tutorial for my Fancy Necklace Organizer...

Materials List:
MDF board about 1/2" thick
Jigsaw
Fancy frame template
Spray paint (in the color of your choice)
Newspaper (for overspray)
1/2" finish nails
Hammer
Ruler or Measuring Tape
Ribbon
Hot glue gun


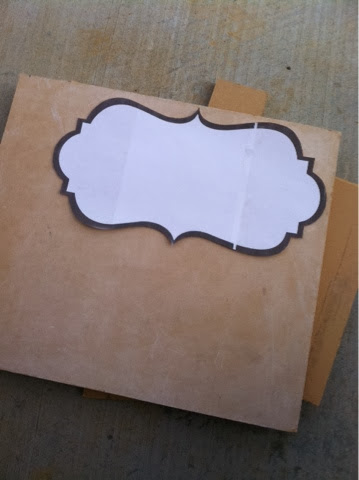
1.  Grab your template and trace around it onto your MDF board.  I found my MDF in the To-Be-Burned pile in the construction site next door to my house. (I've actually been able to score a ton of wood worthy of the coolest projects this way!)  I found the template in the online Silouette store and printed it on two sheets of paper, taped them together and cut them out.  


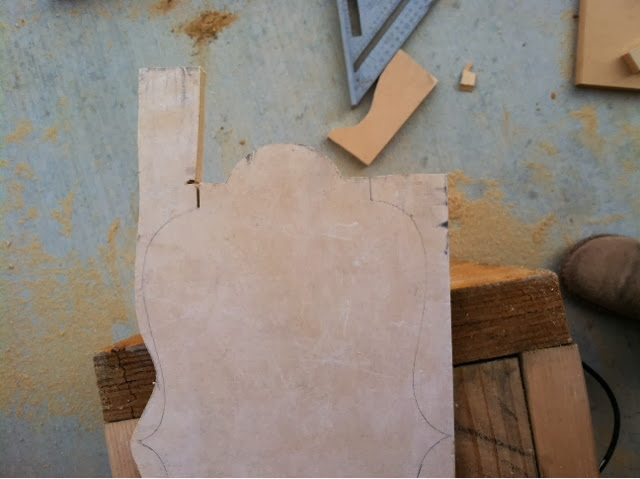
2.  Cut out the shape you just traced with your jigsaw.  (Or, if you want to make it easier on yourself, you can just go buy a fancy plaque at Hobby Lobby.  But then this project wouldn't be {practically} free would it?)  I had room on my board to cut out two, so I used one for my necklaces and the other for Baby G's hairbows.  


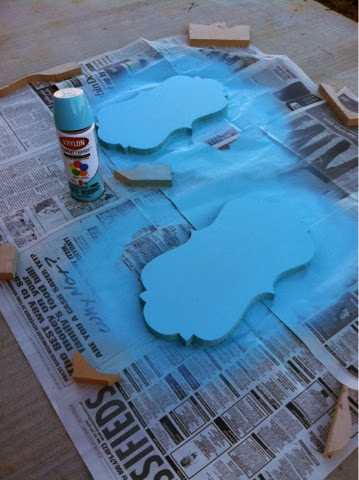
3.  Sand away the imperfections around the sides and on the face, then spray paint with your favorite color.  You may need to give it 3-4 coats.  Mine was good with 3. 


4.  With a ruler (or measuring tape), Mark the places you want to place the nails to hang your necklaces on.  I spaced mine 1-1/2" apart with 7 on the top row and 8 on the bottom row so that they lined up perfectly offset (does that make sense?). 


5.  You may need some needle-nose pliers to help with the next step.  In each spot you marked, hammer in a 1/2" finish nail so that half of the nail is still sticking out.  


6.  When you're done hammering in all the nails, turn it over and glue a ribbon to the back to hang it with.  

(Forgot to take a picture of this step!)


7.  Hang your finished Fancy Necklace Organizer & fill it up!


*Note* My organizer was free because I was able to make it out if scraps I had laying around the house.  Your organizer may be PRACTICIALLY free if you don't have one or more of the materials listed above.  

Thanks for stopping by my blog!

Tuesday, November 19, 2013

Like/Share Giveaway!!

I'm a sucker for free stuff and I'm sure, judging by the consistent popularity of other such giveaways, that you are, too!  So, you can imagine my excitement when I found myself with something to give away...just in time for Christmas, no less!!

Here is what I'm giving away...  One Girls Christmas Dress (with matching headband), available in Newborn through size 6.


AND one Boys Christmas Bowtie, any size.


All you have to do is "Like" my Facebook Page, share the photo of the one you want (dress or bowtie) on YOUR Facebook page, and comment on the photo you want to win with the size you'll need.  Easy peasy?  I thought so.  :)

Winners will be announced on both my blog and on my OBBK Facebook Page on Saturday, November 23rd!

GOOD LUCK!

Friday, November 15, 2013

Boy or Girl?

Ah, finally, I can post about this onesie!  The suspense has been killing me.
Some friends and I have been planning a gender neutral surprise baby shower for a friend who is waiting to find out the sex of her baby.  One of the things we all did was make adorable onesies for the new babe.  And since the baby shower was this morning, I can finally share!

As soon as I was given the blank, white onsie, I knew exactly what I wanted to do with it...and I already had the perfect fabric for it (thanks to my girl, Amy, over at Joey Dresses)!

I wanted to create something that would be all boy for the snips & snails or could instantly change to all girl for the sugar & spice.  The resulting onesie ended up with snap on ruffles and a snap on bowtie!


 For the bowtie I used this tutorial over at One Young Love.  I love her tiny bow ties tutorial because its so easy to follow and she tells you exactly what you need.


The snap-on ruffles are my own little creation.  Sorry, I have no tut to share for this one.  If I make another, I will be sure and post a little tutorial for it.


My favorite part in that they're interchangeable and it wouldn't be terribly hard to make a few more tiny bow ties if it is a boy.  ;) 


Sunday, November 3, 2013

Let's Ride

Can I let you in on a little secret?  I'm a wanna-be-cowgirl.  I've got the boots.  I dig rodeos.  I ride (other peep's)horses whenever I can get the chance.  And now to add to my collection of cowpoke-ness, with the help of my hubby, I have saddles to sit on daily!  Well, saddle stools, that is.


After a bit of thought, we figured the best (and easiest) way to do these was to buy the saddle stools from Target.com (at under $30 each, not a bad find) and old, worn out saddles from various places.  Hubs found one at an antique shop, I found one at a yard sale, and the other one came from a friend (for free!).  
Then, we screwed 2x4's on the stools to support the middle.  The larger saddle was supported vertically, while the other two worked better with the 2x4 laying horizontally.  
After we laid the saddles on top. We strapped them down, sinched up the stirrups, and screwed them in place.  
Now I (almost) feel like a genuine cowgirl.  ;)

Friday, November 1, 2013

Vintage-style Christmas

I fell in LOVE with this adorable 1970's dress the moment I found the pattern on Etsy!  It inspired me to create my own pattern/design based on this dress for Baby G to wear at Christmas time.
 
 
The green chevron will be where you see the stripes, the trees will be the skirt, and the pink an red peppermints will be ruffles on the dress at the empire waistline and on the sleeve-cuffs.
 
I cannot wait to get started on this dress!  I already have the fabric and have designed and cut out the pattern.
I'm also making a matching bowtie for Big Bro A.  I'll post pictures when I'm done.  :D

Let's give this another try...


It's been a while since I've had my OBBK blog!  I deleted it about a year ago thinking that I was done with Oh, Baby! by Kate and I would never sew for profit ever again.  But I wasn't expecting the response that I got from my friends and their friends on the little things that I make for Big Bro A and Baby G.  So, here I am, giving it another shot.

I shut it down because I got far too busy sewing for others and neglecting the fun stuff I had started making for Big Bro A (before Baby G came along).  This time I think I've learned to put my family first.  Of course, as always, the dishes may stay dirty a day longer, and the laundry may not yet be folded for another day, but if I manage my time JUST right, I may be able to pull this off.

So, this is me, again, giving it another shot.  Wish me luck!