Tuesday, August 26, 2014

DIY Chevron Monogram Canvas


Do you have the chevron fever?  I think I must. It's everywhere and it's so fabulous!  I see it in my favorite colors and I get elated inside and want to buy everything that has it on it.  I go crazy when I see it on my favorite fabric websites and start daydreaming of the sweet sweet little girls clothes I can make with it.  I will be very sad when it goes out of style.  My wishful hope is that it won't and that it will become as classic as polka-dots...but I digress.  
On to the tutorial!

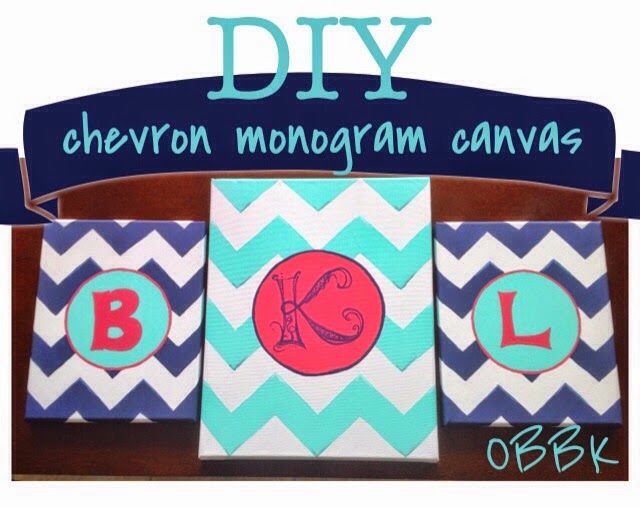
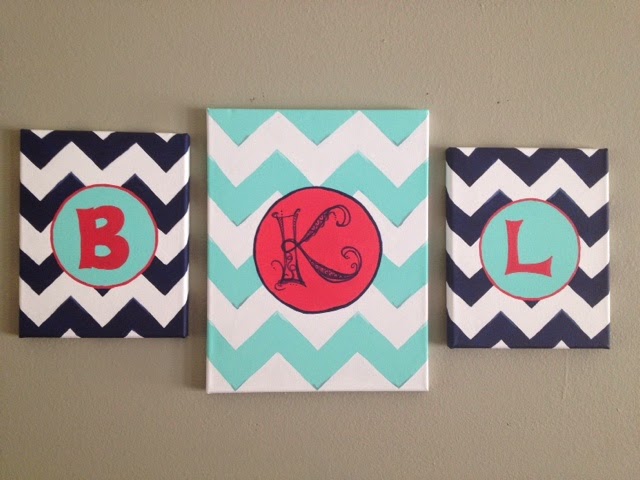
Some friends and I recently got together and made these super fun chevron monogram canvases.  I made the 8x10 Navy ones later on to coordinate with the Aqua 11x14 I made with my friends.  
They were so easy, I wanted to create a tutorial with the smaller ones.  


What you'll need:
8x10 or 11x14 Canvas
4 bottles of paint (you pick the colors, but it looks best if one is white - I chose Navy, White, Coral (melon), and Aqua)
3/4" - 1" wide paint brush
Small round paint brush
Paper or styrofoam plate (for your paints)
Ruler
Pencil (with a good eraser)
Circular object about 4"-5" (to make the circle for the monogram)

Time to create!
1. Take your canvas and with your ruler and pencil, draw a straight line, vertically down the center.  Then do the same horizontally.  From those lines, make a 1-1/2" - 2" grid.  The 1-1/2" is what I did on my 8x10's.  I did a 2" grid on my 11x14. 


2.  Beginning anywhere on the canvas, draw a diagonal line in one of the squares.  Then repeat that same diagonal line all the way up and down that particular column. 

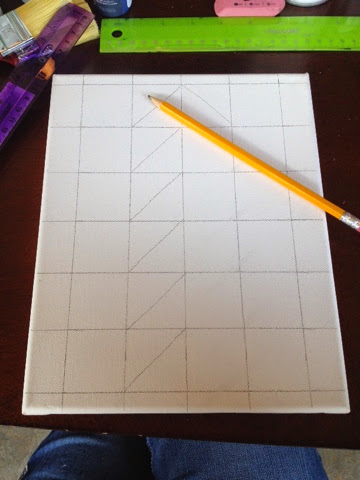
3.  On the next column over, create opposite diagonal lines down that one.  

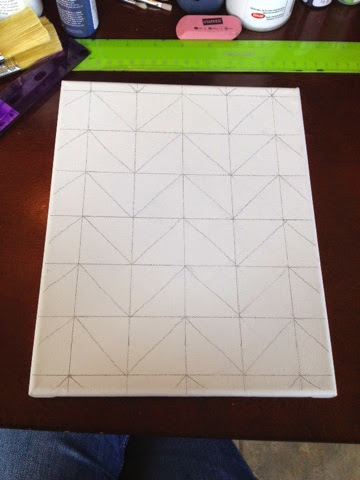
4.  Then continue the pattern until your canvas looks like this...
*Note: the edges may get tricky on ya, but just eye them, getting them pretty close to the rest of the pattern

5.  Erase the horizontal and vertical lines, taking care not to erase the chevron (diagonal) lines that you just made. 

Now your canvas should look like this...

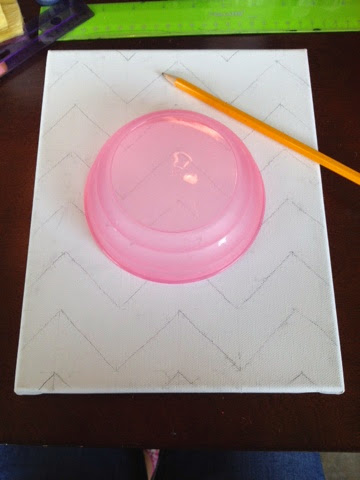
6. Take your round object (I used a bowl), place it in the center of your canvas and trace around it with your pencil.  

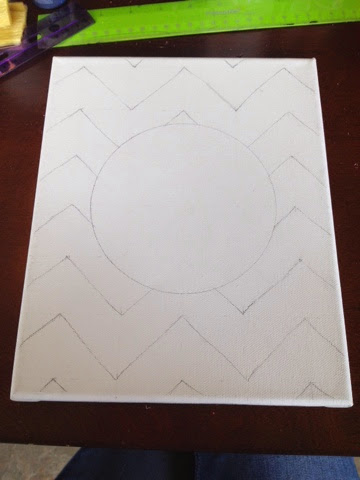
7.  Then erase all of the lines INSIDE of the circle.  

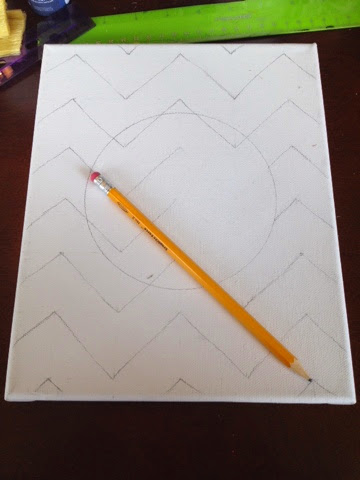
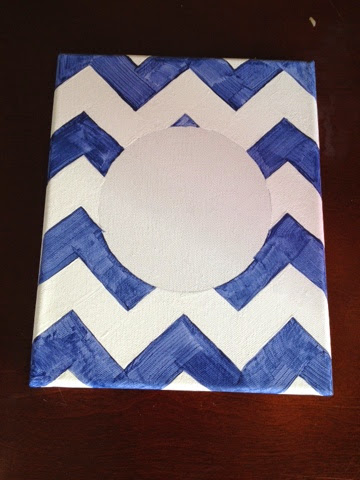
Now you should have something that looks similar to this...

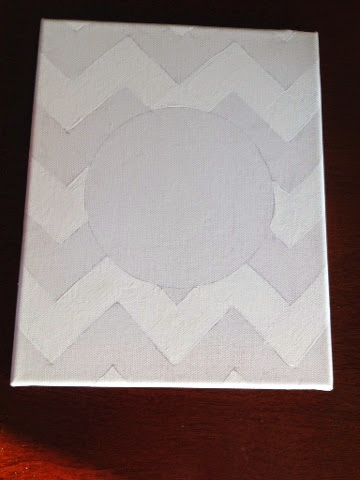
8. Now we start painting!  Begin with your white and paint every other chevron stripe.  Give it two coats. 

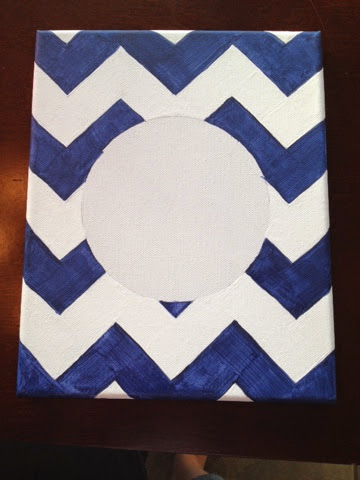
9. Then go back and paint your color stripes.  The darker the color, the more coats of paint you'll need, it seems.  My navy needed 4 coats of paint...
*coat one*

*coat two*

*coat three*

*coat four* - finally!  You can see my pictures progressively getting darker.  Haha.  I did two of these at the same time so it took me a little while to finish...as the sun set.  

10.  Get your circle color and paint the inside of your circle.  

11.  Get your monogram color and frame out the circle with your small round paint brush.  Then add your initial/monogram.  I free-handed my monograms, but you can use a stencil, or pencil it before you use paint to get it just right.  

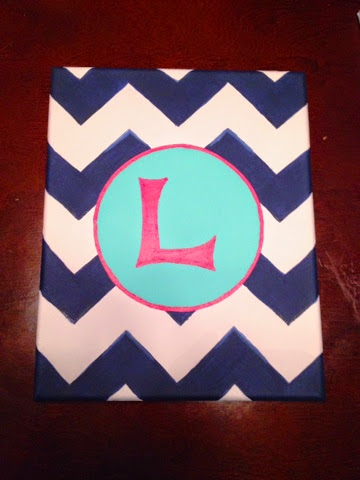
I added some highlights to the top of my peaks and a shading to the bottom of my valleys to "chic" it up a bit.  You can too with just a bit of white and black paint (respectively) mixed with your chevron color and using the small round brush.  

Aaaand...your done!  
Fun, huh?  

Tuesday, July 15, 2014

Sneak Peak: Chair Reupholstery

I got my fabric for my chairs in today!!  The picture online absolutely does not do it justice.  

In our last house, my living room was pretty dark.  Our very large sofa was dark brown, there was a dark brown leather chair, my lamp shades were a dark turquoise, and even my throw pillows were patterned with turquoise, deep lime green, and black.  It was cozy and fabulous, but I've always admired rooms with light colors and lots of white.  
I realize that's not very realistic with littles in the house, but since I get to start all over with new furniture and new decor in a new house, I figure what's the harm in using lighter and brighter accent colors?  


In my new living room I'm going with white and mint green as accents.  And these two chairs in this new fabulous fabric will set the tone for my new color scheme!

Also, I've been taking a million pictures as I disect the first chair, and I'm realizing that I'll need to separate this into two posts.  The first will be taking it apart and the second, putting it back together with the new fabric.  

This may take a couple of weeks (did I mention I have littles?), so bear with me as I take my time with these two future posts!

Sunday, July 13, 2014

DIY Bug Bands

So I've been seeing these Bug Bands everywhere that you wear as a bracelet and they're supposed to keep away the Mosquitos and such when you're out and about.  I thought to myself, I could totally make that with what I have at home already!  So, I did...


It's really the quickest and easiest thing I've ever made and it works like charm!

Just take any sort of string or cord that would hold moisture (plastic/rubber bands wouldn't work in this case), tie them together with a knot at the end and proceed to braid them together.  

When you get pretty close to about 6-8" down, measure it around your wrist.  If it fits well, pull the knot around and slip it between two strands.  Then keep braiding 2-3 more times.   When you have it where you want it, knot and snip the ends.  


When you're done, take Lavender Oil and pour 10 drops on one knot.  Then take Peppermint Oil and pour 10 drops on the other knot.  

Viola!  You're done.  :)

I have had mine for about a week now and it still smells pretty strong.  Plus I think they're cuter than the ones you buy in stores.  

Tuesday, July 1, 2014

Back to life...

On April 27, 2014 my life was turned upside down.  My family and I were literally run over by an EF4 tornado.  It is only by God's will and protection that we are still alive.  Hence, my absence on my blog and on Facebook recently.  
But now that life is beginning to take shape again, I have plans for more projects!  Stay tuned for a couple chairs I will be reupholstering...

Thursday, February 13, 2014

Ella Tunic & Matching Bottoms


I saw an adorable tunic on a popular big name store's website last year and fell in love...until I saw the price.  I'm sure it was conservative compared to other boutique tops, but not for this Thrifty Thelma.  Whenever I see something cute that's beyond my budget, I've just GOT to MAKE it!!
So, I got my notebook, my measuring tape, and my scissors and made my own pattern similar to the design I saw online but with my own sassy flare. ;) Problem was...I only had a pattern size to fit Baby G at the time and I had no idea how and where and by how much to make it any bigger so that I could offer it as an OBBK outfit.   Until I found an adaptable pattern on Etsy!  Don't you just LOVE Etsy??!!  I get the best pattern downloads there!
Now I can FINALLY offer my favorite tunic and matching bottoms to you!


Here's what you need to know...
The fabrics on the left directly coordinate with the ones in Baby G's original outfit.  
The turquoise will be used in place of the teal.  
The multi-color will be in place of the birds. 
The pink will be used in place of the, well, pink.  ;)
The slit in the collar of the tunic will not be there.  I'm taking it out because it was showing a little too much cleavage.  Haha!
If you'd like one, you have until March 15, 2014 to order.
Sizes are available in 3m to 8y.  
3m -3t are $45 each
4t - 8y are $55 each
Comment below or email me directly to order.  

Monday, February 3, 2014

Chevron Quilt

A few months ago, I had all these adorable flannel receiving blankets from Baby G's swaddling days that I didn't want to get rid of, mainly because of their cuteness factor.  But I had no idea what I wanted to do with them...until I saw a fabulous chevron quilt on Etsy!  Then my wheels began a'turnin...
So, I got out a notebook and pencil and sketched out my design and coded all the fabrics so that I knew exactly what fabric went where.  
Then I cut those cute little blankets into 5" blocks, cut them in half diagonally, and arranged them in the order I needed to sew them. 

Since I took my sweet time and only worked on it on lazy Sunday afternoons (hey, talent-building is considered a wholesome Sunday activity, right??) it took me a few months to get the top layer done.


After I sewed all the blocks into strips and the strips into the top layer, I laid out my backing fabric, then two layers of quilt batting, then the top quilt layer and cut everything to size.  (One reason I'm not big fan of quilts is that they're always so thin.  I like a big, snugly, chunky blanket...hence the two layers of quilt batting.)
So, next I pinned it and sewed up the edges to keep it all in place.

 Then I ditch-stitched chevron seams, slapped on a satin blanket binding, and that baby was DONE!

 Really, the last few steps, after putting all the blocks together, only took me a few hours (days, considering this was done in my spare time).

So, now Baby G has her own Toddler Bed Size Quilt!  :D

A neighbor friend and I are currently starting her own Upcycled Receiving Blanket Chevron Quilt for her daughter.  I'll try to make a tutorial in the process of it all then post it on here.  :D

Sunday, January 19, 2014

Rice Buddies

Funny story...The Hubs had a great idea to fill one of our stuffed animals with rice.  Bro A had destroyed two of the rice buddies we use to help keep the kiddos cozy in the winter time.  I'm not getting into the how's or why's of what happened.  Let's just say...he's a 5 year old boy.  ;)
So, instead of making another standard-size/shape rice buddy, The Hubs says "well, why don't you just fill one of his stuffed animals with rice instead?"  I know.  I married a genius.  (Does that make me a genius for marrying him??  We'll just say it does.)  Bro A hears our little convo and instantly goes in search of the perfect stuffed animal to de-stuff and refill with rice.
Our findings?  A Tigger that someone got for Baby G, and a snake Bro A won at the county fair.
(Please note:  If you want to destuff your own stuffed animal to fill with rice, look for one without any plastic parts, as they will melt [or worse!] in the microwave.)

Tigger was a success!


...the snake...not so much...


I guess, when I was patching and filling the carnival snake, I failed to realize that it had been sewn together with plastic thread.  After all, who uses PLASTIC thread???  Anyway, it melted in the microwave and rice came spilling out in a big HOT mess when I took it out.  :(


...So, that's what gave me the idea for this little guy.


Made with my own COTTON thread and fabric.  Haha!  It holds more rice, anyway.

Wanna make your own?  How about a pattern (with instructions)?  You're welcome!


Enjoy snuggling with your cozy new friend!